Discover the Ninja 6.5‑qt pressure cooker air fryer manual, your guide to mastering versatile cooking. Learn safety, setup, and the dual‑mode system that locks juices then crisps. Follow clear steps for pressure, air‑fry, and quick‑start functions. Use the included accessories for extra versatility Perfect for family meals
Product Overview
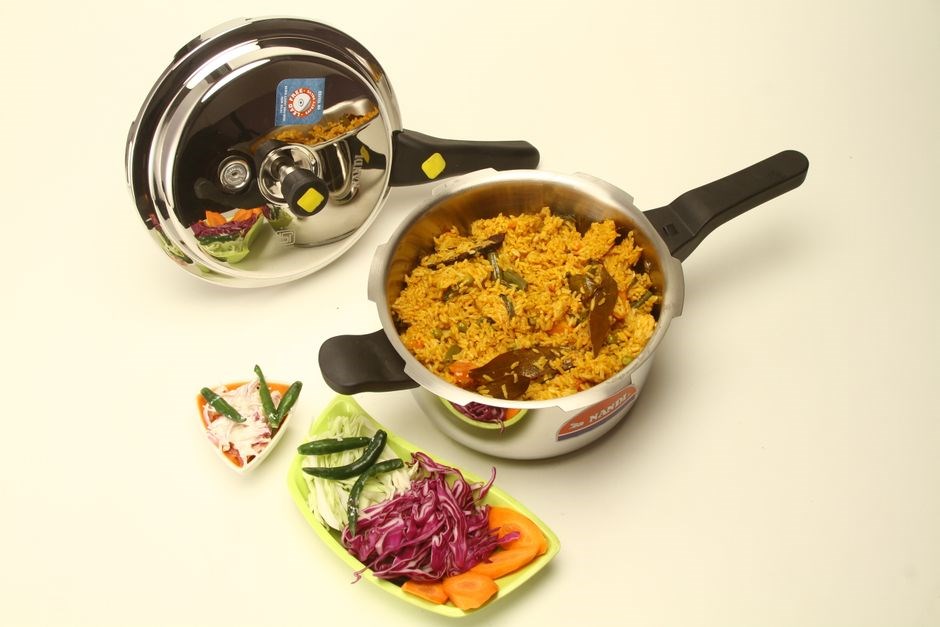
Experience the Ninja 6.5‑qt Pro pressure cooker air fryer, a versatile kitchen powerhouse that blends pressure‑cooking precision with air‑fry crispness. Designed for families and food enthusiasts, this 11‑in‑1 appliance delivers a full range of cooking options—from steaming and sautéing to slow‑cooking and dehydrating—while maintaining a compact footprint. Its stainless‑steel pot and durable silicone lid ensure even heat distribution and easy cleanup, and the 6.5‑quart capacity accommodates large meals or multiple portions. The unit’s intuitive digital interface features a large, back‑lit display and programmable buttons that allow you to set precise time, temperature, and pressure levels. With a built‑in safety valve, pressure‑release mechanism, and automatic temperature control, the cooker keeps cooking consistent and safe. The integrated air‑fryer basket uses Ninja’s TenderCrisp technology to deliver a golden, crispy exterior without excess oil, making it ideal for healthier versions of fried favorites. The appliance also includes a reversible rack, allowing you to cook two dishes simultaneously or layer foods for more efficient use of space. The sleek, black finish and ergonomic handle make it a stylish addition to any countertop. Whether you’re preparing a quick weeknight dinner or a gourmet feast, the Ninja 6.5‑qt Pro offers flexibility, convenience, and reliable performance.
Its matte black exterior features a brushed aluminum base that resists fingerprints, while the silicone seal ensures a tight fit during high‑pressure cooking. Ergonomic controls make it friendly for all

Safety Precautions
Before using the Ninja 6.5‑qt Pro pressure cooker air fryer, read all safety instructions carefully. Keep the appliance away from children and pets. Do not operate the unit with a damaged or loose lid, pot, or sealing ring. Ensure the pot is properly seated on the base and that the lid is securely closed before pressing any button; Never force the lid open while the cooker is under pressure; wait until the pressure indicator drops and the safety valve releases. Do not overfill the pot—fill only up to the maximum fill line indicated on the inner pot. When adding liquids, use room‑temperature water to avoid sudden pressure spikes. Keep the cooker’s electrical cord and plug in good condition; do not expose the cord to heat or water. Store the appliance in a dry place, and keep it out of reach of children. When cleaning, unplug the unit and allow it to cool completely. Do not immerse the base, pot, or lid in water; wash parts separately with mild detergent and a soft cloth. Avoid using abrasive cleaners or metal scouring pads on the stainless‑steel pot. Never place the appliance on a hot surface or in direct sunlight while it is still hot. Follow the manufacturer’s guidelines for safe operation and maintenance to prevent accidents and ensure optimal performance. Always keep the lid’s sealing ring clean and replace it if worn. Care. If the pressure indicator fails to drop after the cooking cycle, consult the troubleshooting guide before attempting to open the lid. Remember to turn off the appliance and unplug it before cleaning or storing.

Parts & Accessories
The Ninja 6.5‑qt Pro pressure cooker air fryer comes with a complete set of components designed for safe, efficient cooking. The base unit houses the heating element, electronic controls, and safety valve. The stainless‑steel pot, rated for 6.5 quarts, is fitted with a removable inner lid and a silicone sealing ring that ensures a tight seal during pressure cooking. The pressure‑cooking lid is interchangeable with the air‑fry basket, which features a perforated design for even air circulation. A crisp‑rack attachment allows you to achieve a traditional deep‑fry texture without oil. Included accessories also feature a silicone spatula, a measuring cup, and a set of recipe cards for quick inspiration. The power cord is rated for 120 V, and the unit’s LED display provides real‑time status updates. All parts are dishwasher safe unless otherwise noted. For optimal performance, replace the sealing ring annually or when it shows signs of wear. The user manual, quick‑start guide, and warranty card are stored in a protective sleeve for easy reference. Proper storage of each component in a dry, cool environment will extend the appliance’s lifespan and maintain its safety features. To keep the appliance in peak condition, store it in a place, avoid stacking heavy objects on the base, and inspect the sealing ring for cracks or wear; replace if necessary. The silicone spatula and measuring cup can be washed in the dishwasher, while the stainless‑steel pot should be hand‑washed. For reference now, keep quick start guide refer to recipe cards for meal ideas. Keep manual now in a dry, cool spot!

Setup & Assembly
Begin by placing the base unit on a flat, heat‑resistant surface. Ensure the outlet is within reach and the cord is not kinked. Insert the stainless‑steel pot into the base, aligning the side‑wall with the base’s mounting ring. Secure the pot by sliding the inner lid onto the pot’s rim, then snap the pressure‑cooking lid onto the inner lid, making sure the silicone sealing ring is seated correctly. Attach the air‑fry basket to the base by aligning the basket’s handle with the base’s basket mount; the basket should click into place. If you have the crisp‑rack, slide it into the basket before closing. Verify that all parts are firmly seated and that the safety valve is in the “closed” position. Connect the power cord to the outlet, then press the “Power” button to test the LED indicator. The unit should display a green light, indicating readiness. Before first use, run a short “Clean” cycle with water to remove any manufacturing residues. Finally, review the quick‑start guide for any model‑specific nuances. Your Ninja 6.5‑qt Pro is now ready for cooking.
Before operating, verify the safety valve is seated and the sealing ring is intact. Place the pot lid firmly, then close the pressure‑cooking lid; a click indicates proper sealing. If the safety valve clicks open during pre‑heat, check for debris or a misaligned ring. For the air‑fry mode, attach the basket and ensure the crisp‑rack is inserted if desired. Connect the unit to a grounded outlet, and press the “Power” button to activate the LED. The display will show “Ready” when the unit is fully powered. For first‑time use, run a 5‑minute “Clean” cycle with water to flush out any residue. After the cycle, drain the water, wipe the pot and lid with a damp cloth, and dry the basket. Store the appliance in a dry area, and keep the power cord coiled to prevent damage.
When switching between modes, always allow the unit to cool and release pressure before removing the lid. Use the temperature and time presets for common dishes, or manually set your own parameters. The “Keep Warm” function maintains food at 165°F for up to 2 hours. For best results, use the silicone mat to prevent sticking and to keep the basket clean.
Operating Modes
Choose between pressure cooking, air frying, and keep‑warm. The unit defaults to high pressure; set time and temperature via the digital display. Air‑fry mode uses rapid air circulation for a crisp finish, while pressure mode locks in juices. Use presets or custom settings Press to start
Pressure Cooking Features
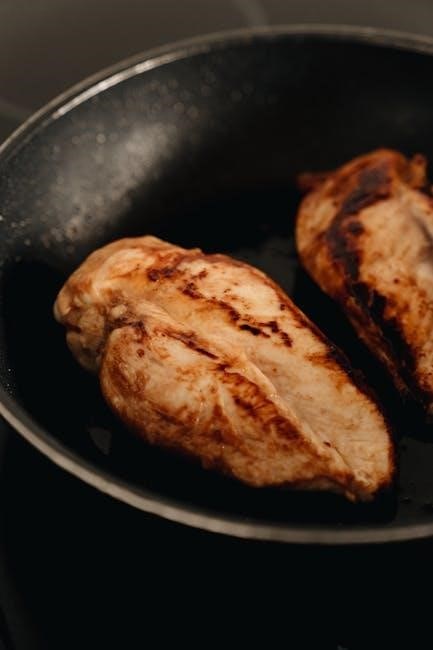
Pressure cooking is the core of the Ninja 6.5‑qt Pro. The unit defaults to high pressure, but a low‑pressure setting is available for delicate dishes. The digital display shows a countdown timer and the current pressure level. A built‑in safety lock prevents the lid from opening while the cooker is under pressure. When the cooking cycle ends, the pressure automatically releases to a safe level, or you can manually trigger a quick release by turning the pressure release valve. The vent is designed to vent steam safely, and the lid’s gasket ensures a tight seal to build pressure efficiently. The cooker’s pressure‑cooking mode uses a combination of heat and steam to cook foods quickly while preserving nutrients and moisture. The 6.5‑qt capacity allows you to prepare large portions, from stews and roasts to rice and beans. The appliance includes a “keep‑warm” function that maintains the food at 140 °F after the cycle is complete, preventing overcooking. The pressure‑cooking mode can be paired with the air‑fry function in a single cycle: first pressure‑cook to lock in juices, then switch to air‑fry for a crisp exterior. The user can set the time from 1 to 60 minutes, and the temperature can be adjusted from 170 °F to 212 °F. The display also shows the current mode, remaining time, and pressure level. The pressure‑cooking features are designed for safety, convenience, and versatility, making it suitable for everyday meals and special occasions alike. The appliance’s robust construction and clear instructions help users achieve consistent results with minimal effort. Enjoy versatile cooking.
Air Fryer Functions
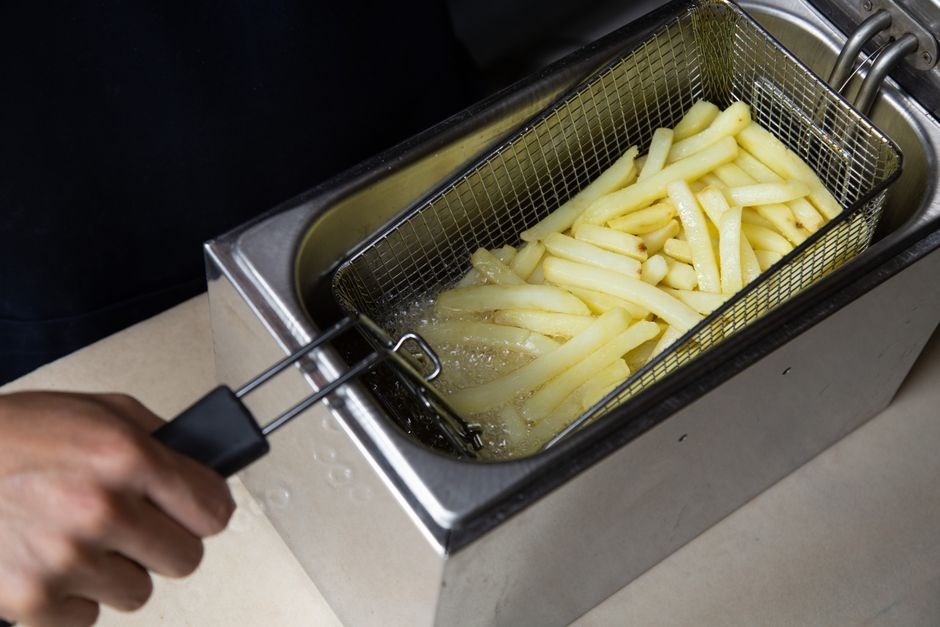
The Ninja 6.5‑qt Pro’s air‑fry mode delivers a crispy finish without the need for excess oil. The appliance uses rapid air circulation to cook foods evenly, producing a golden exterior while keeping the interior moist. The air‑fry basket is removable and can be used on its own for smaller portions or in combination with the pot for larger meals. The digital interface allows you to select a temperature from 180 °F to 400 °F and set a timer from 5 to 45 minutes. The “Keep‑Warm” feature maintains the finished dish at 140 °F until you’re ready to serve. A built‑in “Auto‑Start” button initiates the cycle after the timer counts down, and the display shows the remaining time and current temperature. The unit’s safety lock prevents the lid from opening while the air‑fry basket is in use. The air‑fry mode can be combined with the pressure‑cook mode in a single cycle: first pressure‑cook to lock in juices, then switch to air‑fry for a crisp finish. The appliance’s sturdy construction and clear instructions make it easy to achieve restaurant‑style results at home. Enjoy healthier meals with less oil and a faster cooking time. The versatility of the air‑fry function allows you to experiment with a variety of recipes, from crispy chicken wings to roasted vegetables. Each cycle is programmable to match the desired texture, ensuring a perfect crunch every time. You can adjust the temperature to accommodate different foods, and the quick release feature ensures safety while maintaining flavor. The integrated timer and display provide real‑time feedback, letting you monitor progress without opening the lid for perfect results every time
Cooking Time & Temperature Settings
The Ninja 6.5‑qt Pro offers precise control over both temperature and timing for each cooking mode. In air‑fry mode, temperatures range from 180 °F to 400 °F, with a timer that can be set from 5 to 45 minutes. The digital display updates in real time, allowing you to monitor the remaining time and current temperature. The “Auto‑Start” button initiates the cycle after the timer counts down, and the “Keep‑Warm” function maintains the finished dish at 140 °F until you’re ready to serve. In pressure‑cook mode, the default setting is high pressure, and the timer can be adjusted from 0 to 60 minutes. The unit automatically switches to low pressure during the cooling phase, ensuring a safe and even release of steam. The manual includes a table of recommended times for common dishes such as chicken, beef, rice, and vegetables, helping you achieve optimal results. For example, a 1‑pound chicken breast will cook in 10 minutes at high pressure, while a 2‑cup rice batch takes 10 minutes at low pressure. The air‑fry basket can be used independently for smaller portions, and the pot can be used for larger meals or combined with the basket in a single cycle. The device’s safety lock prevents the lid from opening while the air‑fry basket is in use, and the quick‑release valve allows you to safely vent pressure after cooking. By adjusting both the temperature and time, you can tailor the cooking process to your specific recipe, ensuring a perfectly cooked meal every time. Use the preset “Crispy” or “Roast” options for quick recipes, and verify now the seal before cooking!
Maintenance & Cleaning
After each use, let the pot cool, then rinse the inner pot, lid, and basket with warm soapy water. Wipe the exterior with a damp cloth. Dry all parts before reassembly. Store in a dry place to prevent rust. Avoid abrasive cleaners. Keep the pot dry to avoid mildew. Keep sealed. daily!!
Cleaning Tips for Pot & Lid
After each use, allow the inner pot and lid to cool completely to avoid burns. Remove any food residue by gently scrubbing with a non‑abrasive sponge and warm, soapy water. For stubborn stains, soak the pot and lid in a solution of equal parts water and white vinegar for 15 minutes, then rinse thoroughly. Avoid using steel wool or harsh scouring pads, as these can scratch the non‑stick coating and compromise its integrity. When drying, use a soft towel or let the parts air dry on a rack; excess moisture can lead to mildew or rust on the metal components. Store the pot and lid separately from the basket and accessories to prevent cross‑contamination and to keep the non‑stick surface pristine. Periodically inspect the lid’s silicone seal for wear or cracks; replace it if necessary to maintain proper pressure sealing. Keep the pot’s interior free of oil buildup by wiping with a paper towel after each cleaning cycle. For deep cleaning, you may use a mild baking soda paste (baking soda and water) applied to the interior, left for 10 minutes, then rinsed. Never immerse the pot or lid in a dishwasher; the high temperatures and detergents can damage the non‑stick coating and the silicone seal. Follow these steps regularly to ensure your Ninja 6.5‑qt pressure cooker remains safe, efficient, and ready for every cooking adventure. Before storing, verify that the lid’s pressure release valve is clear of debris; a clogged valve can affect pressure buildup during cooking. Clean the gasket.
Cleaning Tips for Basket & Components
Begin by removing the basket from the air fryer unit and separating all detachable parts. Gently rinse each component under warm running water, using a soft sponge or brush to eliminate food residue. Avoid abrasive cleaners or steel wool, as they can damage the non‑stick coating and the silicone gasket. For stubborn stains, create a paste of baking soda and water, apply it to the affected area, and let it sit for 10 minutes before scrubbing lightly. Rinse thoroughly and dry with a clean towel or allow to air dry on a rack. When cleaning the basket’s mesh, ensure that all holes are free of debris; a clogged mesh can impede airflow and reduce crisping performance. Use a small brush or a pipe cleaner to dislodge any trapped particles. Inspect the silicone gasket for cracks or tears; replace it if you notice any signs of wear to maintain proper sealing during air frying. After cleaning, reassemble the basket and components, making sure all parts are aligned correctly. Store the basket in a dry place, preferably in a mesh bag or container that allows airflow, to prevent moisture buildup and preserve the non‑stick surface. Regular maintenance of the basket and its components will extend the life of your Ninja 6.5‑qt pressure cooker air fryer and ensure consistent, crisp results. For extra durability, rinse the basket with warm water and a mild dish soap, then dry it with a soft cloth; avoid storing it in a plastic bag that traps moisture, instead keep it in a breathable container or wrapped in a paper towel to maintain airflow and rust!

Troubleshooting
When the Ninja 6.5‑qt pressure cooker air fryer shows an error or stops working, start by checking the power connection and ensuring the unit is on a level surface. Verify the lid is sealed and the safety latch has engaged; a loose latch can trigger a pressure warning. If the cooker does not reach pressure, confirm that the vent cap is seated and the pressure release valve is clear of debris. For air‑fry mode issues, clean the basket mesh to allow proper airflow; food residue can block the vents and reduce crisping. If the appliance does not heat, check that the temperature sensor is not obstructed and that the thermostat is set correctly. A “No Heat” message often indicates a faulty heating element; contact Ninja support for a replacement. If the device shuts down during cooking, ensure the pot is not overfilled and the base is level. If the pressure indicator stays at “Low” after the set time, the valve may be stuck; gently tap the base to release any blockage. For any error code that does not resolve, reset the unit by unplugging it for 30 seconds, then plugging it back in and restarting the cycle. If problems persist, consult the user manual’s error code chart or reach out to Ninja customer service for assistance. Always follow safety precautions when troubleshooting to avoid injury or damage. Please

FAQ
- Q: How do I reset the Ninja 6.5‑qt pressure cooker air fryer?
A: Unplug the unit, wait 30 seconds, then plug it back in and press the reset button if available. This clears error codes and restores default settings. - Q: Why is the pressure not building?
A: Check that the lid is properly sealed, the safety latch is engaged, and the vent cap is on. Ensure the pot is not overfilled and the base is level. - Q: Can I use the appliance for baking?
A: Yes, the air‑fry basket can bake cookies or cakes. Use a lower temperature and monitor closely to prevent over‑browning. - Q: What is the maximum fill line for the pot?
A: Fill no higher than the “Max” line on the inner pot to maintain proper pressure and safety. - Q: How do I clean the pressure release valve?
A: Remove the valve cap, rinse with warm soapy water, and wipe with a soft cloth. Do not use abrasive cleaners. - Q: Is the appliance dishwasher safe?
A: The inner pot and basket are dishwasher safe on the top rack. The lid and base should be hand‑washed to preserve seals. - Q: What should I do if the unit displays a “Low” pressure warning?
A: Verify the safety latch, check for obstructions in the vent, and ensure the pot is sealed. If the warning persists, contact support. - Frozen? Add liquid. Use extra water and heat